Create Origin Group
Origin Group Configuration
In this section, you will configure an Origin Group to provide rerouting in the event of a problem. You can associate an Origin Group with a caching behavior so that requests are routed from the primary source to the secondary source for high availability.
- Go to the S3 dashboard, create a new S3 bucket in a different area
- Give the S3 bucket a unique name, remember that the S3 bucket name is globally unique, so add a personalization suffix, for example:
cloudfrontlab-s3bucket-secondary-<YourNameHere>
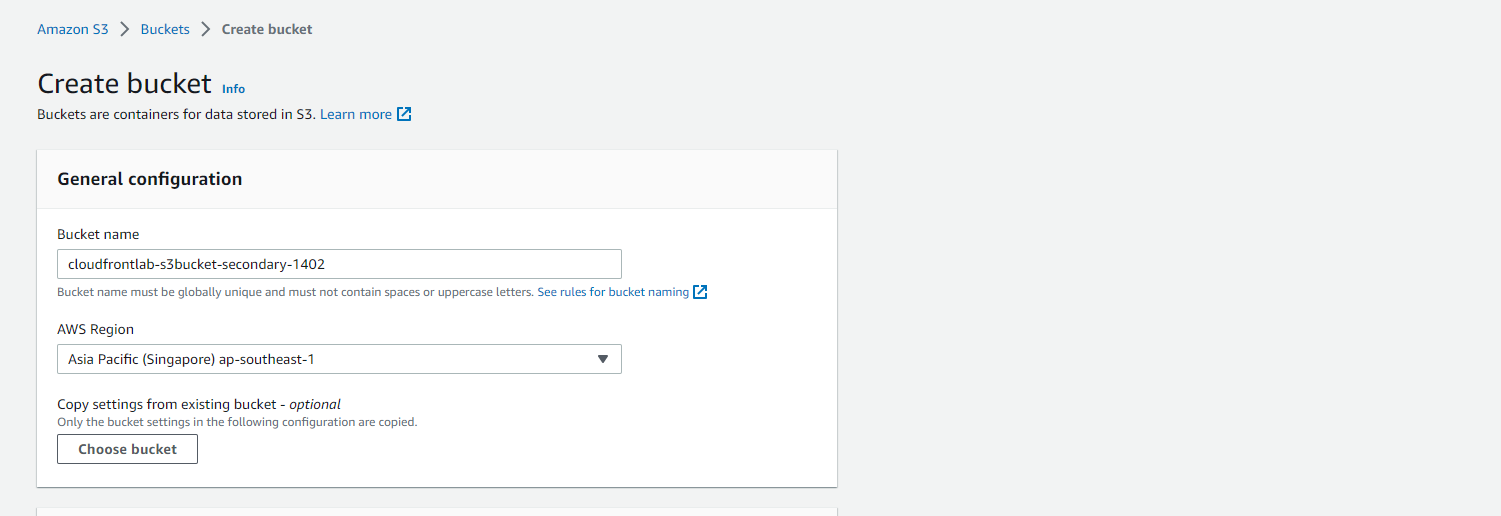
- Select Create bucket

- Create a secondary-index.html file on your computer with the HTML content below:
<html lang="en">
  <body>
    <h1>CloudFront Lab</h1>
    <strong>Hi, this is a page from my secondary Origin! We now support Origin group and failover!</strong>
  </body>
</html>
- Open a web browser and log in to the S3 console.
- Select the name of the S3 bucket that you want to upload the file to.
- Click the “Upload” button in the upper right corner of the web page.
- Select the secondary-index.html file from your computer by clicking the “Add files” button or dragging and dropping the file into the upload area.
- Click the “Upload” button to upload your secondary-index.html file to S3.
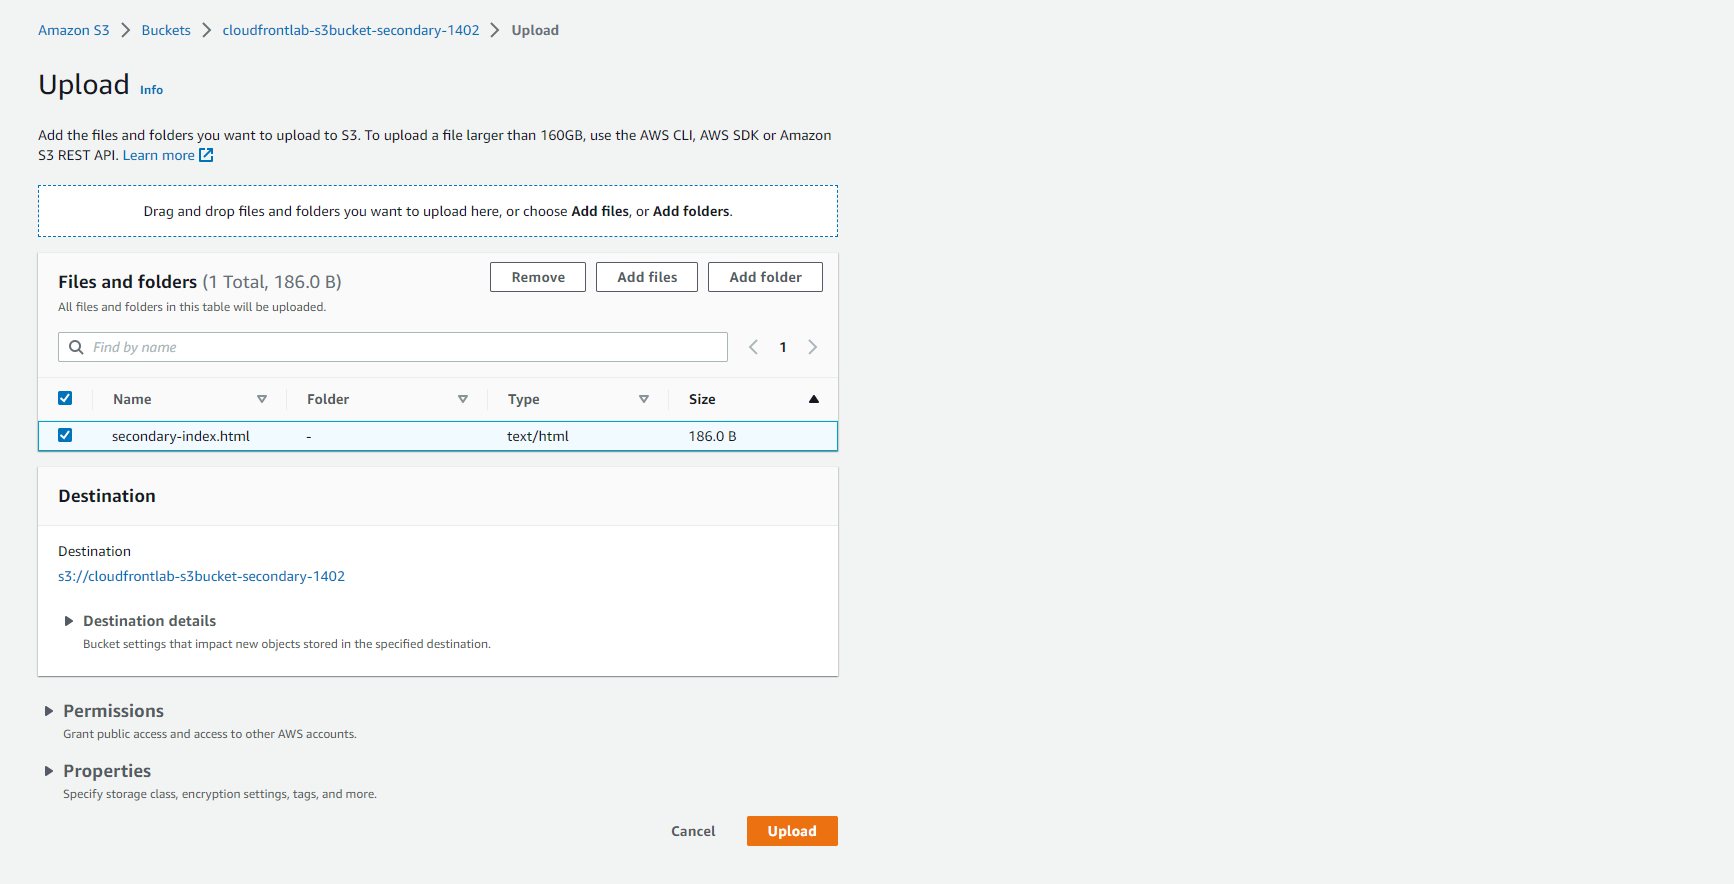
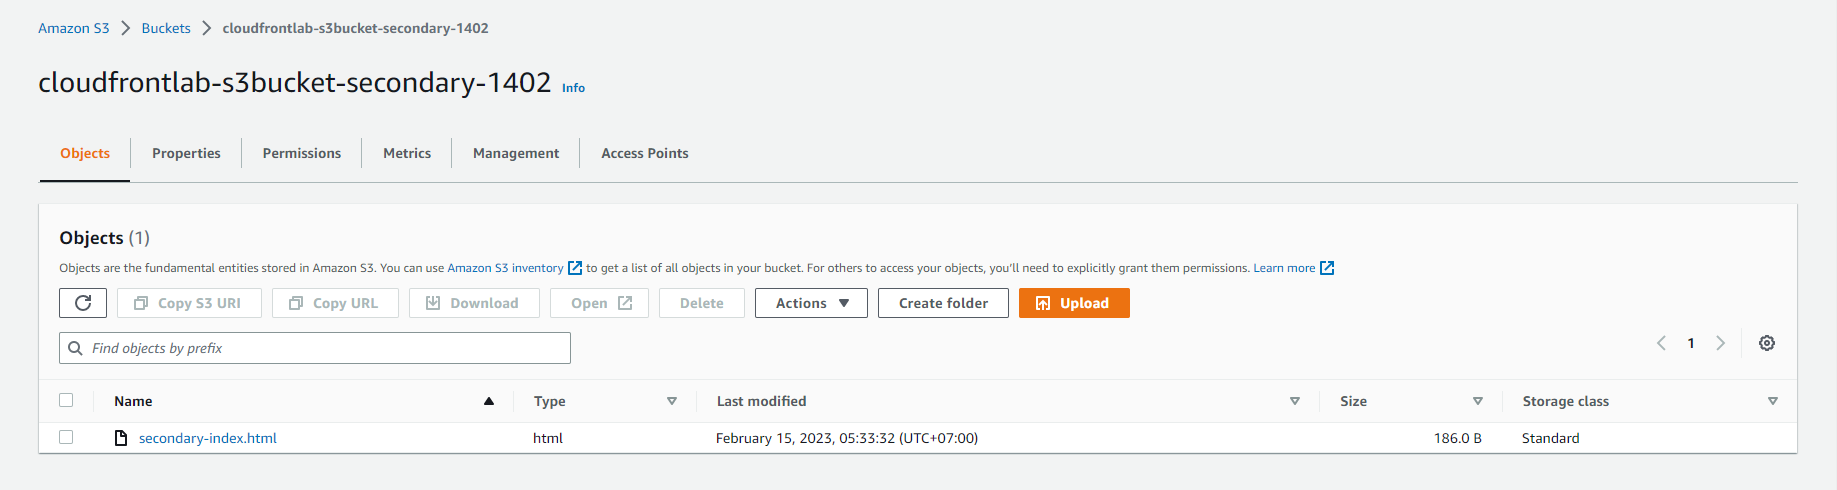
- Upload successful.
- Go to your AWS account and select the CloudFront service.
- Find and select the CloudFront Distribution for which you want to configure the origin group.
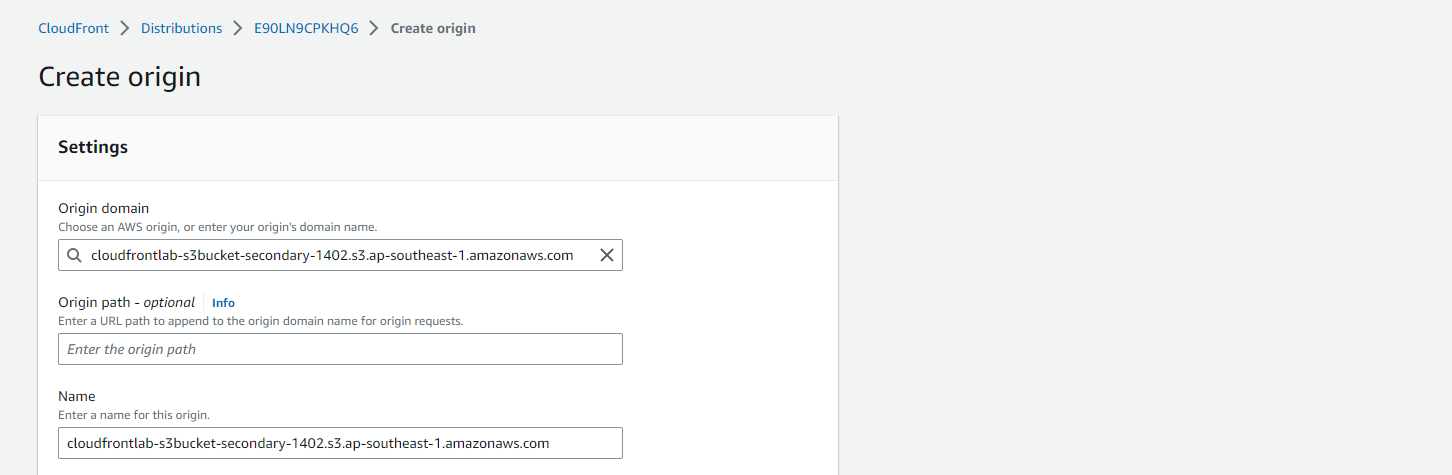
- Create a new origin by selecting the “Create Origin” option
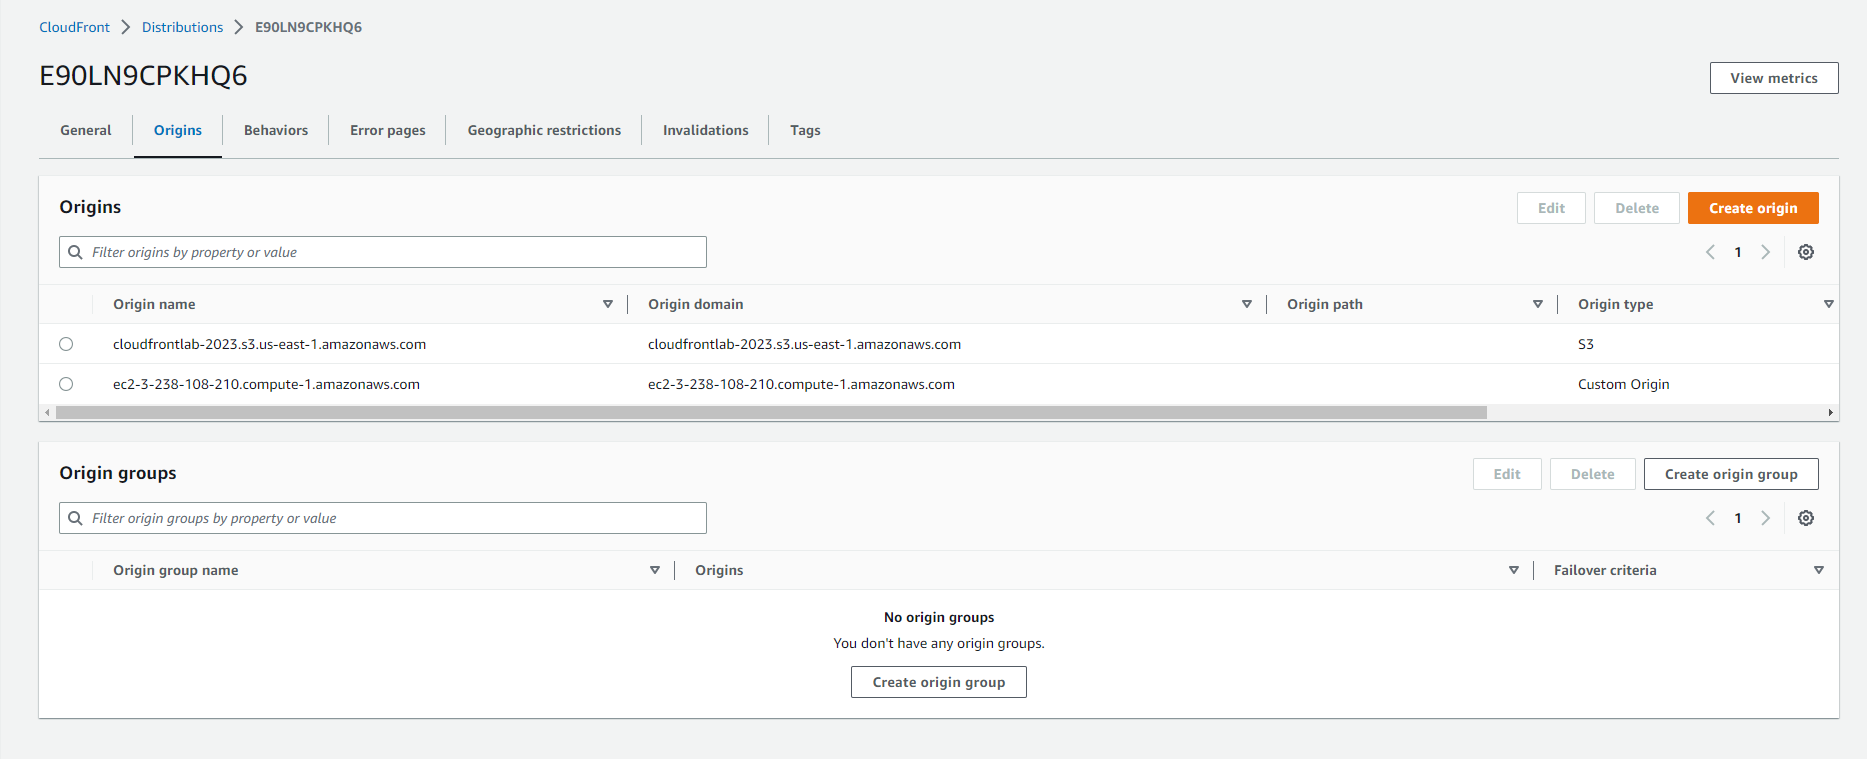
- Choose your origin domain name and select the new S3 bucket containing the secondary-index.html file.
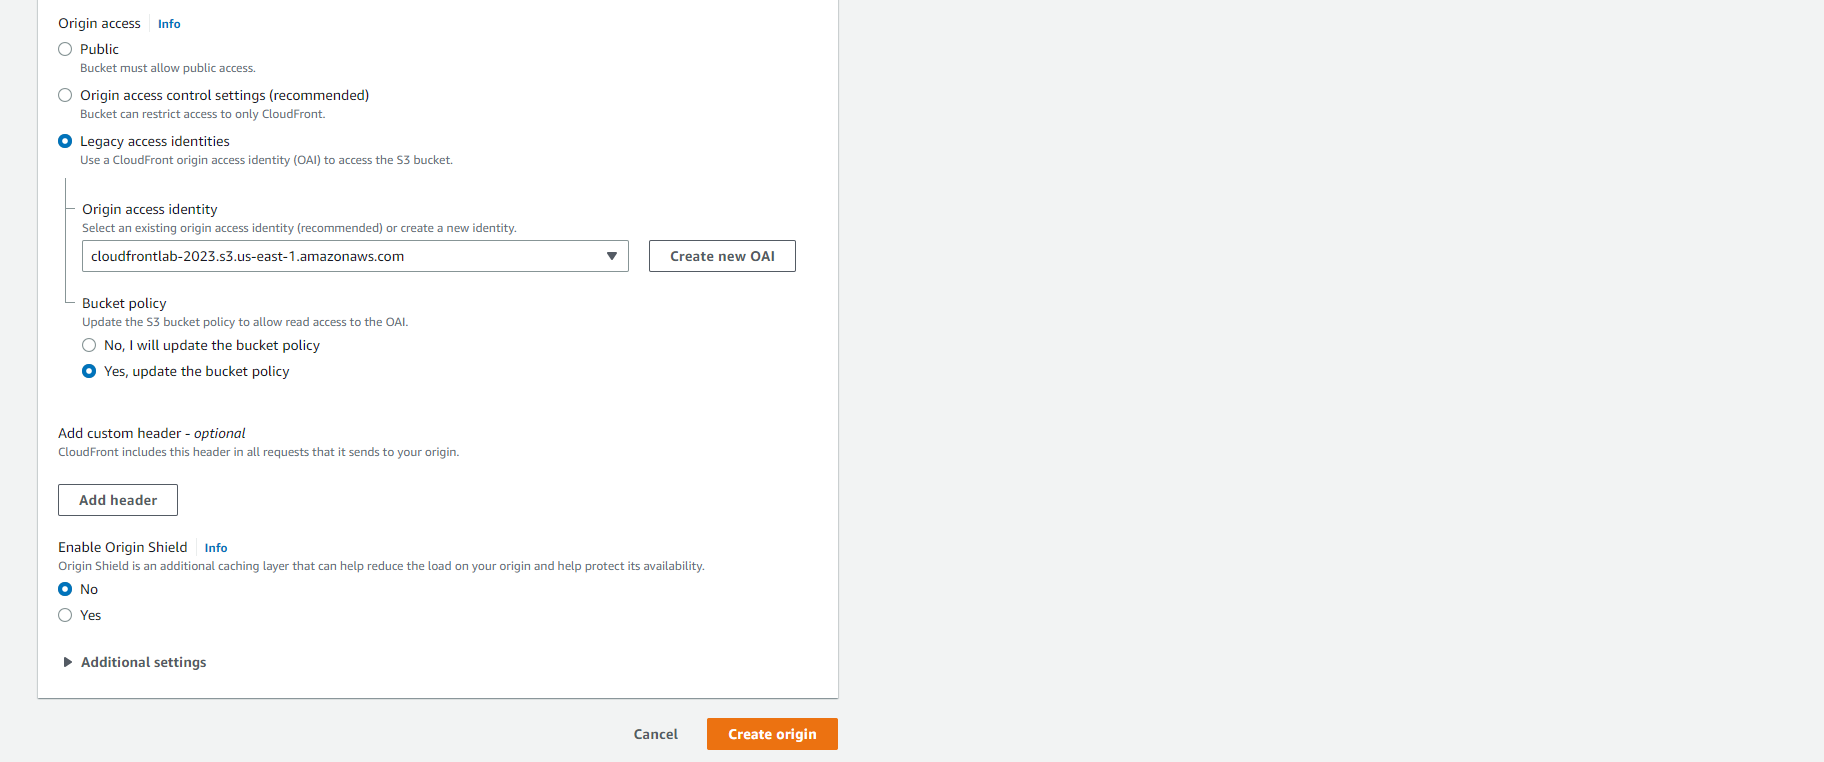
- Set up access to the S3 bucket by selecting “Yes, use OAI” and selecting “Select” to select the OAI you created earlier.
- Update the bucket policy by selecting “Yes, update the bucket policy”.
- Select Create origin
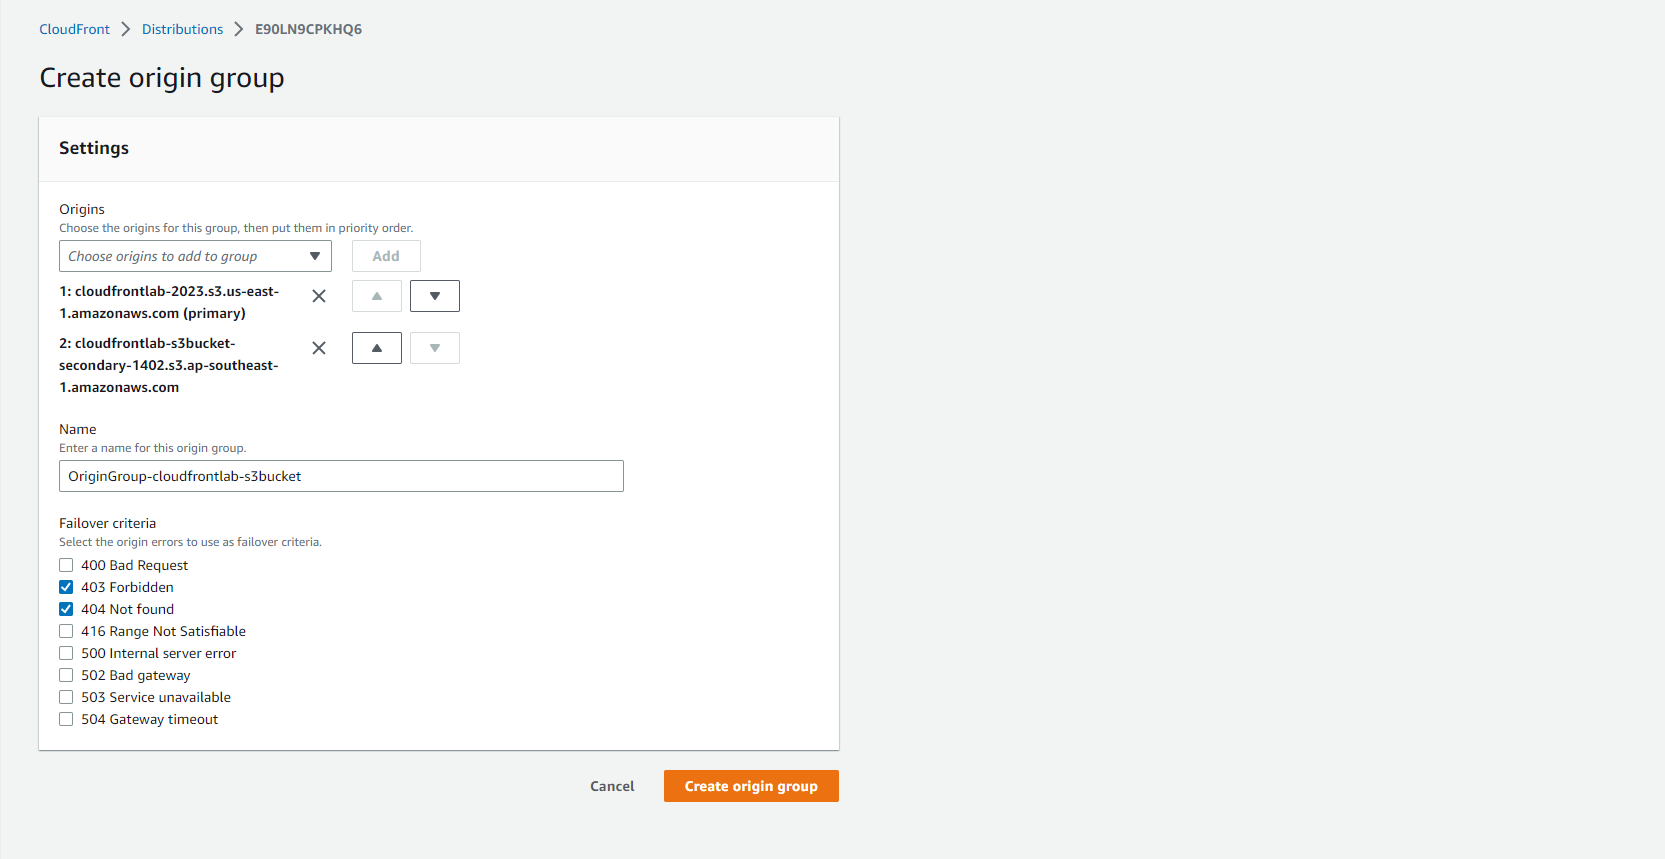
- Create origin successfully. Click the Create Origin Group button to create a new Origin Group.

- Make origin group configuration. Select the source from the drop-down list and click the Add button to add the source to the Origin Group.
- Use cloudfrontlab-s3bucket-* as primary origin
- And cloudfrontlab-s3bucket-secondary- as secondary origin
- For failover criteria, select 403 Forbidden and 404 Not Found.
- Click the Create origin group button to finish adding the source to the Origin Group.
- Once done, you have successfully added the source to Origin Group on CloudFront. When the primary source fails, CloudFront automatically redirects to the second source to ensure service continuity.

-
Edit default behavior on CloudFront to use new Origin Group
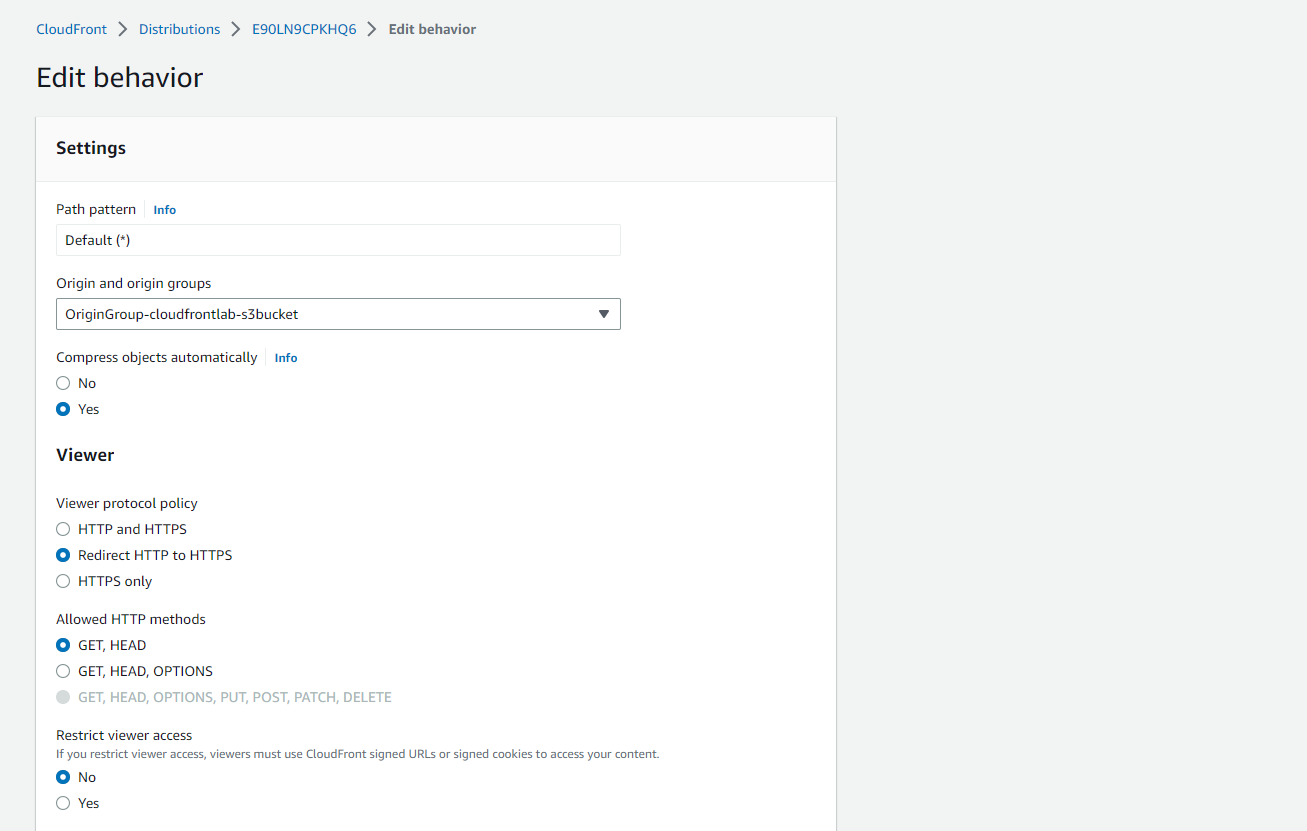
- Select the Behaviors tab
- Select Default(*) and click the Edit button to edit the default behavior of the distribution.

- Select the Origin Group created in the previous step.
- Click the Save changes button to save the changes.
- Once done, CloudFront will use the new Origin Group as the source when accessing the distribution. You can test failover functionality by trying to visit the website and temporarily disconnecting from the network to check if CloudFront redirects to the second source.
- Once the distribution status is changed to Deployed, you can request the secondary-index.html site from CloudFront. If CloudFront is working correctly, you should see the second S3 origin serving your request.
- Open a web browser and access the URL of the CloudFront distribution.
- Change the URL from /index.html to /secondary-index.html to request the site from the second S3 origin.
- Check if the web page has been uploaded from the second S3 origin. If the web page is properly uploaded and displayed, it is an indication that CloudFront is working correctly and redirects to the second S3 origin when necessary.
- Note: If the site is not uploaded or displayed incorrectly, double check your settings to make sure it is properly configured and working as expected.
